It’s Week 2 at Camp HOMER!
In this week’s fun-filled activity, we’re making music with a DIY Wind Chime!
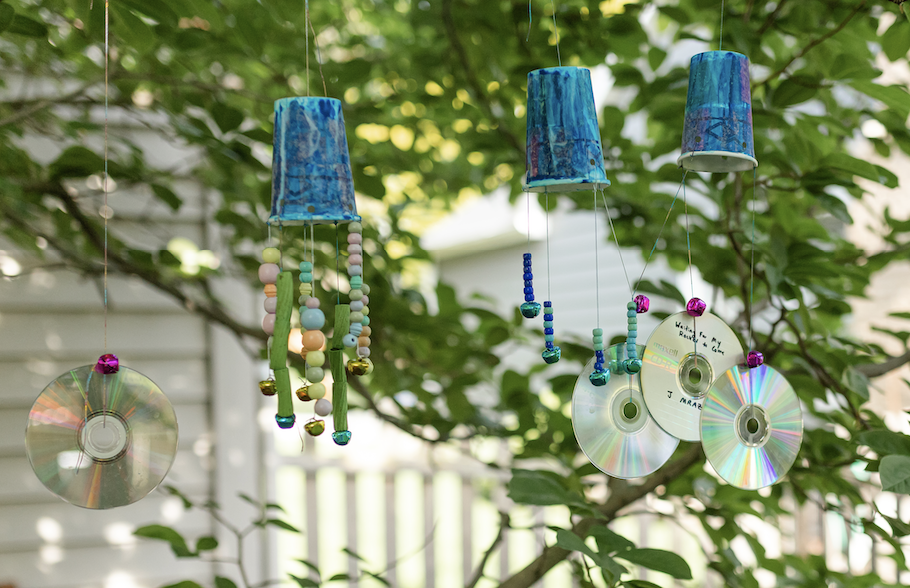
With a few simple materials (recycled items are a plus!) and kid-friendly directions, you’ll have a colorful wind chime to hang in your yard and the soothing sounds of nature around you all summer long.
What You’ll Need:
A Paper or Plastic Cup
Paint and/or Stickers
Paintbrush
Hole Puncher, Pen, or Scissors
String
Beads
Bells, old CDs, keys (anything that jingles!)
Creating Your Wind Chime (grab your gown-up for this part!):
- Decorate your cup! You can use colorful paints, stickers, or tissue paper to cover the outside of the cup.
- Let the cup dry. This may take some time, so feel free to have a snack, play on HOMER, or have a dance party!
- Turn the cup upside down and punch a few holes through the top (what used to be the bottom) of the cup.
- String beads, bells, and any other noise-making objects through the holes and connect the strings at the top (be sure to leave enough room to tie the string around a branch!)
- Hang your wind chime on the nearest tree branch, then listen and enjoy the magical sounds around you!
Ready to make more music? Check out games like Sumville Studios and Jack’s Concert on the HOMER app!