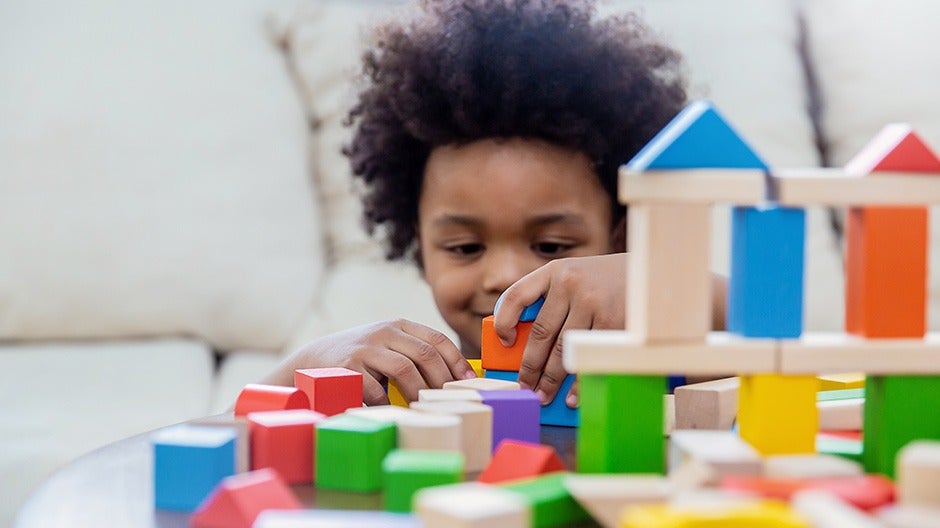
The world is full of many different shapes. In fact, every visual element around us, from trees to skyscrapers to cars to our kids’ wooden blocks, is made of shapes—often many of them put together!
Before they can even speak, children notice these shapes, although they don’t quite understand what they are. Because shapes are a fundamental part of our world, it’s important for children to develop shape expertise even at young ages.
Teaching your child shapes is more than just helping them understand what a circle, triangle, or octagon is. Recognizing and understanding the special attributes of shapes is an essential Core Skill that prepares kids for more advanced learning.
So what can you do to help your child develop this skill?
Here are 20 fun activities to try at home that help make learning shapes both educational and entertaining for your child.
The Short Cut
- Learning shapes is a Core Skill, one of the 5 C’s that help kids thrive in school and life
- When kids learn to identify shapes, they also learn to distinguish between objects and categorize things
- Learning shapes can help kids with counting, problem-solving, patterns, and spatial recognition
- Parents can help by pointing out shapes in everyday life, doing art projects that use shapes, and playing games that teach shapes with their kids
- A play-based learning membership can help kids learn how to recognize shapes—and many of the other essential building blocks of math—at the right time and in the right way
Different Types of Shapes for Kids to Learn
When teaching shapes for kids, it’s important to know what to start with and, as your child understands the basics, which shapes they can master next. Let’s take a look!
1. Basic 2D Shapes (for Toddlers and Beginners)
- Circles
- Squares
- Rectangles
- Triangles
2. Advanced 2D Shapes (for Kindergarteners and Up)
- Hearts
- Arrows
- Stars
- Semicircles
- Ovals
Talking about Shapes
Regardless of which shapes you’re helping your child learn, you are probably going to need to reinforce their ability to recognize and name them.
Use the names of the shapes as much as you can. Point them out where you see them. (“Look at the wheels on that car! They’re circles, aren’t they?”)
Ask your child what shapes they see. Go a little further when you have the time, and ask them to count sides and corners, so they begin to understand the components of each shape.
Teaching Shapes the Montessori Way
Handling shapes is critical to your child’s understanding of them too.
If your child can touch and turn physical objects with a particular shape, they can hone their ability to understand the form of the shape. This is an important part of how many classrooms teach kids to understand shapes if they follow the popular Montessori educational philosophy.
Handling shapes, especially three-dimensional shapes, also helps kids grasp the fact that all objects—including objects that they use every day!—are made out of shapes.
Try some—or all—of the activities we’ve collected below to give your child a variety of ways to touch and turn shapes of all kinds!
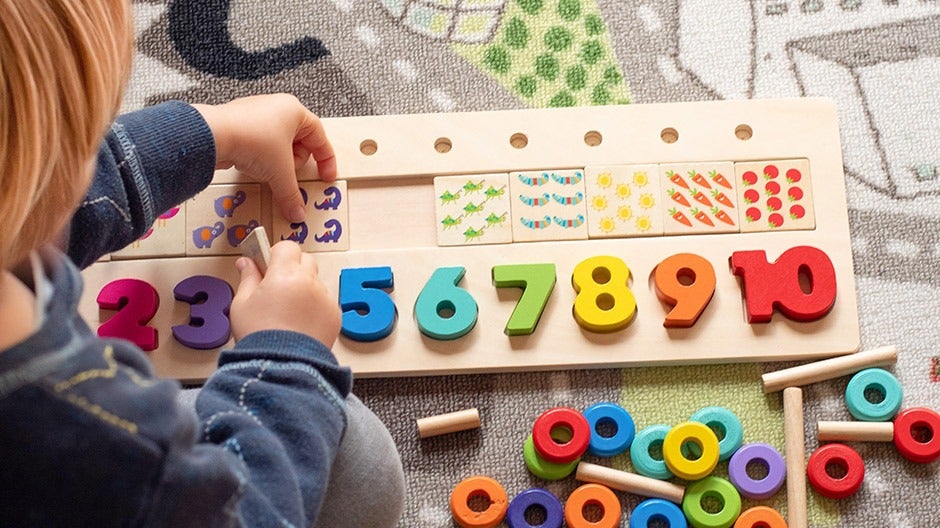
20 Interactive Activities to Make Shape Learning Fun
All of these activities are hands-on and incorporate other Core Skills, like math, science, and art. They’re also highly adaptable.
If your child is just beginning to learn about shapes, you may want to stick with the basic 2D shapes we mention above. If they’re really getting the hang of this shape thing, you might try the advanced 2D shapes above.
1. Stuffed Shapes
This activity combines building fine motor skills with shape learning—perfect for young hands and minds!
What You Need
- Brown paper grocery bag
- Single hole punch
- Scotch or masking tape
- Kid-safe scissors
- Thick yarn
- Old newspapers, stuffing, tissue paper, or fabric
What to Do
(These directions are for making a stuffed circle. The same techniques can be repeated with whatever other shapes you want to make!)
- Trace two circles onto the grocery bag and cut them out.
- Stack the two cut-out pieces together and use the hole punch to make holes all around the edge of the circles.
- Cut a large piece of yarn for your child to use to sew. Knot one end so it won’t go through the holes, and wrap tape around the other (like a shoelace) to make it easier for your child.
- Help your child “sew” around the edge of the circle by weaving the yarn through the holes. Leave a section open, though, so you can stuff it!
- Crumple up the newspaper (or whatever material you chose) and stuff it into the circle.
- Have your child sew the rest of the circle together.
- Tie the rest of the yarn to the knotted yarn and cut off whatever “tail” is left.
These shapes can be the basis for all sorts of games too. You can play hide-and-seek with them. Or catch. Or your child can use them as pillows for their stuffed animals or dolls!
2. Shape Sorting Sensory Bin
Exploring the world through a sensory lens develops many connections in your child’s brain. Problem-solving skills, fine motor skills, spatial awareness, and more are stimulated when your child is focused on their senses.
What You Need
- Paper
- Index cards or cardboard
- Markers
- Two bins
- Dividers
- Shredded paper
What to Do
- Divide a piece of paper into nine squares. Draw a shape inside each square and write its name beneath it.
- Cut out each square.
- Draw a bunch of the same shapes on the index cards or cardboard.
- Cut them out.
- Place all the cut-out shapes into one of the bins and cover them with shredded paper.
- Use dividers (index cards or paper or even blocks your child might have) to make a 9-space grid in the other bin.
- Place one of the paper squares (with the shapes and names of the shapes) into each section of the grid.
- Have your child sift through the shredded paper, find cardboard shapes, and place them in their corresponding section!
You can make this activity more challenging by only making black-and-white shapes. This will focus your child on shape (as opposed to shape and color) as they search in the bin.
3. Fizzy Shapes Sensory Bin
Dig through your kitchen cabinets to find everything you need for this activity—a mash-up of math, science, and sensory stimulation, sure to be a hit with your child!
What You Need
- Plastic bin
- Cookie cutters, muffin tins, ice cube trays, jar lids, or anything else that can hold liquid
- Baking soda
- Spoon
- Vinegar
- Water
- Food coloring
- Eyedropper
- Small bowl
What to Do
- Set up your child with a plastic bin somewhere they can move around, like on the kitchen floor or outside.
- Have them spread out the cookie cutters and other holder shapes on the bottom of the bin. Talk about the names of the shapes as they do. (“This is a circle. Where should we put the circle?”)
- Using a spoon, have your child place 2–3 tablespoons of baking soda inside each shape.
- Add a few drops of food coloring to each pile of baking soda.
- Pour a little vinegar into the small bowl.
- Show your child how to use the eyedropper to get some of the vinegar and drop it onto the baking soda piles.
- Watch the magic!
To extend this activity, you can urge your child to make some hypotheses. What happens if they dilute the vinegar with some water? What if they layer colors?
4. Sensory Shape Squish Bag
Easy to make and beautiful to look at, this is a great sensory activity to get your child up close to shapes.
What You Need
- Ziplock bag
- Foam shapes
- Gelatin dessert (like Jell-O) or cornstarch-water mixture
- Duct tape or other strong tape
What to Do
- Make the gelatin dessert according to instructions and put it into the fridge until it’s set. Or using a 1:12 ratio, mix cornstarch and water, microwave it until thick, and then cool.
- Ask your child to add a handful of foam shapes to a ziplock bag. (You can name the shapes together as they drop them into the bag.)
- Pour in about a half cup of gelatin dessert or cornstarch mixture.
- Seal it up and reinforce the zip end with tape. The Squish Bag is good to go! You can place it in a window so light shines through it, but it’s fun to play with anywhere!
Engage in conversation about the shapes. Which one does your child like the most? Why? How many circles (or squares or triangles, etc) are in the bag? Can your child trace the shapes with their finger?
5. 3D Bubble Shapes

This STEM activity uses 3D shapes and homemade bubble solution. This one is fun outside when it’s warm, and it’s great for a group of kids too!
What You Need
- Pipe Cleaners
- Straws
- Kid-safe scissors
- Bubble solution
What to Do
- Cut the straws into thirds.
- Bend the pipe cleaners into the shapes you want for bubble wands (cubes, pyramids, spheres, etc.) and thread them through the straws so the pipe cleaners become the “skeleton” of the bubble wands.
- Cut off any excess pipe cleaner.
- Dip the different shaped wands into the bubble solution and make bubbles!
Some shapes you may want to make include: a cube, a pyramid, and a sphere. Ask your child if they think the cube bubble wand will make cube-shaped bubbles!
In the end, it won’t—the bubbles will always become spheres. That’s because the liquid molecules in the bubble solution bond to each other in the most efficient way possible, which always means a sphere. Spheres have the least amount of surface area for the volume of air trapped inside of any shape.
But you can learn a lot about shapes while making the wands, and the science behind the bubbles is pretty cool!
6. Floating Shapes Experiment
If your kids like magic, they’ll love this exciting experiment!
What You Need
- Dry erase marker (preferably new)
- Water
- Glass or ceramic shallow bowl
- Straw
What to Do
- Work with your child to draw shapes on the bottom of the bowl with the dry erase marker. Make sure to fill the shapes in.
- Pour water into the bowl slowly.
- Watch as the shapes float up!
For extra fun, your child can use the straw to blow the shapes around the bowl.
Why does this work? We wondered too! The ink in dry erase markers is insoluble, so it can’t dissolve in water. It also doesn’t have “sticking” qualities (which is why it’s easy to erase).
The combination of these two traits makes it “come to life” when you add water!
7. Paper Plates Yarn Shapes
Here’s another art project that taps into multiple skills: shape recognition, art, and fine motor all in one!
What You Need
- Paper plates
- Pencil
- Hole punch
- Kid-safe scissors
- Yarn
What to Do
- Ask your child to draw one big shape on a paper plate. Do the same with different shapes on other paper plates.
- Cut out the shapes. (If your child is skilled with scissors, you might just need to start the cut with a hole poked through the middle of the plate.)
- Tie one end of the yarn through the shape and around the edge of the plate.
- Ask your child to loop the yarn around the edge and through the shape, creating a yarn “frame” around the shape.
After the yarn is fully framed around the shape, you can hang the frame in the window! If you want to extend the art portion of this project, your child can paint or color on the paper plates before they use the yarn.
8. Hidden Shapes
What You Need
- White paper
- White crayon
- Kid-safe, nontoxic markers or watercolor paints (watercolors work best)
What to Do
- Draw a shape on a piece of white paper with the white crayon.
- Give your child the piece of paper. Tell them a shape is hidden on it and ask if they can find it.
- Ask them to draw or paint over the paper with the marker or watercolors. The shape should appear like magic!
Try drawing a bunch of shapes on a single piece of paper to make a longer activity. Or see if your child can draw the hidden shapes and have you find them!
9. Shapes Necklace
Your child can make this macaroni-and-pipe-cleaner necklace and then wear it on a shape scavenger hunt or other expedition!
What You Need
- Macaroni (colored or plain)
- Pipe cleaners
- Yarn
- Kid-safe scissors
What to Do
- Help your child string noodles onto a pipe cleaner.
- Work together to decide on a shape and bend the pipe cleaner into it.
- Twist the ends of the pipe cleaner together.
- Cut off the extra ends.
- Make as many shapes as your child wants. Talk about the shapes as you make them.
- String them on the yarn and tie it into a necklace!
10. Shape Search in Salt
Tell your child they’re going to be an archaeologist and dig for shapes!
What You Need
- A wide, shallow bin
- Paper
- Markers
- A lot of salt!
- Paintbrush
What to Do
- With your child, draw shapes on a piece of paper, making sure to color them all in.
- Place the paper at the bottom of the bin.
- Cover it with salt, so the shapes are hidden.
- Give your child a paintbrush and ask them to excavate the shapes!
- As they brush away salt and uncover the shapes, talk about which shapes they are, what color they are, and what size they are.
11. Mini-Tangram Puzzle
Tangrams are geometric puzzles with pieces shaped like triangles, a square, and a parallelogram. Your child can use those shapes to make many others. This fun tangram puzzle helps kids piece shapes together like pros!
What You Need
- Our free HOMER printable mini-tangram puzzle
- Kid-safe scissors
What to Do
- Start by cutting out the different shapes that you’ll see on page one of the printable.
- Use the outline on page two to demonstrate to your child where the pieces need to fit.
- After showing them, let them practice on their own! Once they’ve mastered this activity, you can have them complete the puzzle using only the border on page three.
This activity helps kids understand the concepts of shapes, problem-solving, symmetry, angles, and comparisons.
12. Play Dough Shapes
Hands-on learning is beneficial for kids. So let them take what they’ve learned about shapes and practice it with play dough.
What You Need
- Play dough
- A laminated sheet of paper with outlines of different shapes (if you don’t have a laminator, you can also use clear plastic sleeves made for binders and place the paper inside them)
What to Do
- Show your child the paper with its shape outlines.
- Give them the play dough.
- Ask them to fill in the shape outlines on your paper, using the names of the different shapes. (“Can you fill in the circle now?”)
Sensory activities like these are an excellent way to help kids engage with what they’re learning. And the laminated paper or plastic sleeves will make it easy to clean up when playtime is done!
13. The Tray Memory Game
Critical thinking skills like concentration, memory, and following directions are crucial to successful learning. This game helps your child practice these skills naturally while learning about shapes!
What You Need
- A tray
- Shapes cut from paper
What to Do
- Place three shapes on the tray.
- Show your child the shapes and describe the characteristics of each one. For instance, “This is a square. A square has four equal sides.”
- After showing and describing the shapes, cover the tray with a cloth and take one of the shapes away.
- Reveal the tray again (now with two shapes), and ask your child to tell you which figure is missing.
Besides helping your child learn the properties of different shapes, this game helps test and improve their memory.
14. Match the Missing Shape
Recognizing shapes is an essential skill for your child to learn. This game makes it fun using shapes.
What You Need
- Paper
- Kid-safe scissors
- Pens or crayons in different colors
What to Do
- Draw a few different shapes on paper, making sure to draw two of each shape.
- Cut out one shape from each pair you’ve drawn (for example, if you have two circles, cut out one and leave the other).
- Hand the cutouts to your child and ask them to match the shapes they’re holding to the missing spaces in the paper.
15. Detective Role-Play
This active play game teaches your child to look for shapes in the environment. It also helps them practice listening, deducting, and other logic-based skills.
What You Need
- Crayons
- Notebook
What to Do
- Select any two objects around your home that have the same shape but look different (for example, a book and a bookmark, which are both rectangles). Don’t tell your child what they are yet.
- Explain to your child that they are a detective and need to solve an important shape mystery.
- Give your child some clues about the shape of the object so that they can solve the mystery. For example, “It has three sides.”
- When your child feels confident that they know what the object is, ask them to draw it in their detective notebook.
- Give them clues for the second object.
- Have them find it and draw it in their notebook.
- Evaluate the two different items together. Discuss how many other objects have the same shape.
- Play the game again with another shape. You can also head outside to search for shapes around the neighborhood!
16. Make a Shape Collage
This crafty activity asks your child to look for similarities and differences between shapes. It’s a fun way to help them use another part of their brain.
What You Need
- Two sheets of white paper
- Two colored sheets of paper
- Kid-safe scissors
- Nontoxic, kid-safe glue stick
What to Do
- From one sheet of colored paper, cut out different styles of the same shape (for example, a right-angled triangle, an obtuse triangle, and an acute triangle).
- Cut out various styles and sizes of a different shape (for example, a small, medium, and large circle) from the second piece of colored paper.
- Ask your child to make a collage of one type of shape on each sheet of white paper.
This activity will help your child understand the true characteristics of each shape. They’ll see that even though the three triangles look different, the fact that they each have three sides makes them all triangles!
17. Shape I Spy
Shapes are all around! With a simple twist, the classic childhood game of “I Spy” can help reinforce lessons about shapes for kids.
What You Need
- Nothing. You can play this game anywhere, making it perfect as a road trip game.
What to Do
- Look around and find something in your environment with a clearly recognizable shape. Tell your child, “I spy a (name your shape) with my little eye.” For instance, if you’re thinking of the sewer cover on the street, you’d say, “I spy a circle with my little eye.”
- Have your child look around and try to figure out what you’re thinking of nearby. For example, they might ask if it’s a wheel on a car or the logo on a store across the street.
- If your child gets the right shape but doesn’t guess the object correctly, you can say, “That’s a circle, but it’s not the circle I’m thinking of. Can you spy another one?”
- If your child guesses something that’s the wrong shape, you can say, “That’s a different shape. I’m thinking of something that’s a circle like this,” and then draw the shape in the air to remind them what the object looks like.
- Continue until your child correctly guesses the object.
- Ask them to pick a shape so you can try to guess.
- Alternate turns until your child begins to lose interest.
18. Sort the Shapes
Sorting and classifying are important skills for kids to master. This activity helps them practice sorting while learning about shapes in a lighthearted way.
What You Need
- Construction paper in several colors
- Kid-safe scissors
- White paper
- A marker
What to Do
- Cut various shapes from several colors of construction paper. Make some large and some small. Aim for a nice mix of shapes and sizes.
- Use the marker to draw a vertical line down the middle of a piece of white paper. This is your game board.
- Once everything is ready, spread the shapes out in front of your child.
- Grab a shape and put it on one side of your prepared board. Put a different shape on the other side.
- Ask your child if they can continue sorting the shapes for you. Leave any shapes that don’t get used on the side.
- When your child has sorted everything, ask how they decided where to put each shape. (Expressing their thinking in words is an important communication skill.)
- Once you’ve had a chance to hear their thoughts, clear the game board and ask your child if they can sort the shapes a different way. Give them a chance to think about it and watch them sort. If they have trouble, you can use guided questions to help them.
Tips
- Asking, “Why did you put that shape there?” or “Why didn’t you use that shape?” can help your child’s critical thinking skills
- Try sorting shapes by size, type of line (curvy or straight), number of sides, color
- Put the shapes into a sandwich bag when your child finishes. That way, you can pull them out to play another day.
19. Shapes Constellations
What You Need
- Paper
- Pencil
- Hole punch
- Flashlight
What to Do
- Trace a shape on a piece of paper.
- Have your child punch holes along the lines of the shape using the hole punch. Help them if their hands aren’t strong enough to use it yet.
- When they’re done, shine a flashlight through the paper and see the shape constellations you’ve made on the wall. Name the shapes to help your child learn them.
- Give your child a turn tracing the shapes.
You can trace multiple shapes on one piece of paper for a whole galaxy of stars!
20. Shape Hunt
Can your child find the shapes you’ve hidden around the room? They’ll have to look carefully!
What You Need
- Paper
- Kid-safe scissors
- Pen
What to Do
- Draw five shapes that your child knows on a piece of paper. Try to make them as large as possible.
- Cut out the shapes.
- Once you have the shapes, have your child go to a different room.
- Hide the cutouts around the room you started in. You can pick easy or difficult spots, depending on their age and experience.
- When all five shapes are hidden, call your child back and ask them to look around the room and find the shapes you hid. If they spot a shape, ask them to bring it to you and tell you which one they found.
- After your child finds all five shapes, quickly review them by having them say the name of each one again.
You can have your child hide shapes for you or an older sibling to find as well. This activity is a fun way to work on shape identification together.
As your child looks around the room, they’ll be practicing their observation skills. As they get better at this game, you can slowly increase the difficulty of your hiding spots so that the game grows with them.
Why Are Shapes Key to Development?
1. Math
When we teach children shapes, we help lay a foundation for basic math skills. They will then be able to use these skills when tackling more complex math concepts in the future.
For instance, geometry is a branch of mathematics that is, in part, the study of shapes.
Understanding the basic attributes of different shapes from an early age can help your child grasp other geometric concepts as they get older.
Working with shapes can also help preschoolers learn to count (as they discover how many sides different shapes have). Counting will pave the way for them for them to start adding, subtracting, and learning other math skills.
2. Letter Recognition
The link between learning shapes and math may seem obvious to many people. But how does it help with literacy?
Think for a second about some of the letters of the alphabet. We know that “O” looks like a circle, and the letter “V” looks like a triangle that’s missing a side.
When a child can distinguish between different shapes, it may be easier for them to recognize the various forms of letters. As a result, learning different shapes may help with early childhood reading and writing.
In addition to helping with letter recognition, knowing shapes can help kids learn the many road signs and symbols everywhere around us—stop signs, yield signs, and so on.
Recognizing signs by shape can help kids link the letters on the sign to the word they represent. When your child learns to read signs by sight, they’re developing their reading skills. In this way, shapes and literacy go hand in hand.
3. Characterization and Comparison
When a child learns that a triangle has three sides, a square has four equal sides, and so forth, it encourages them to concentrate on the characteristics of each shape.
As they apply their growing knowledge of basic shapes, they’ll develop the foundation needed to analyze more complicated figures when they get older. They’ll use that skill throughout their entire life.
Questions like, “What makes a rectangle different from a square?” will help develop their observational skills as well as their ability to compare and contrast.
Here are a few other questions you can ask to help your child begin to make comparisons between shapes:
- How is a circle different from an oval?
- What makes a square different from a triangle?
- How is the heart different from the triangle?
Though they seem simple, these questions help your child analyze and think about what they’re seeing.
4. Problem-Solving
Learning shapes for kids can help introduce problem-solving skills.
For instance, when playing with shape-sorting toys, your child must identify the different characteristics of a triangle so they can then match it with the triangle hole in the toy.
This skill can also help with putting together puzzles. A child will have to pay attention to the shape of the piece they’re holding and the openings in the puzzle to determine which part fits where.
Learning how to problem-solve with shapes has lifelong benefits. Though you probably don’t think about it, you likely use this knowledge regularly.
For example, when you’re looking for a lid to fit a certain container, do you bother grabbing a rectangular one to fit a circular container? No, you use what you know about shapes to find the right one.
When you’re making a bed, what happens if you put the sheet on the wrong way? It won’t fit. You have to use what you know about rectangles to make sure the sheet is on the bed correctly.
These are just a couple of examples. You can probably think of even more ways that you use the shape of something to help you solve a problem.
Learning about shapes can help your child develop problem-solving skills that last a lifetime.
Integrating Shape Learning into Everyday Life
Once you’re focused on helping your child learn about shapes you’ll begin to see them everywhere. The world is made of them!
In addition to doing activities and playing games centered on shape education, you can slip some shape learning into practically anything you do.
What excites your child? What are they most curious about? What is their favorite part of the day? Hone in on the things that ignite your child’s energy and use them as opportunities to integrate shape learning.
For instance, you could bake cookies together and cut the dough into different shapes. Or you could write a story in which the characters are all shapes.
Some other ideas include:
- Playing shape games
- Learning shapes in the kitchen
- Taking walks to look for shapes
- Going on excursions and looking for shapes (playground, zoo, museum, storytime at the library)
- Writing and drawing with shapes
- Reading about shapes
- Playing outside using shapes
- Engaging in imaginary play about shapes
- Doing art with shapes
- Gardening using shapes
Focusing on shape recognition in the course of your child’s day begins to give them a basis for identifying and organizing visual information.
Shapes for Kids with Begin!
Learning shapes can help your child develop many essential skills, including math, letter recognition, and problem-solving. These are all key elements to setting your child up for success on their learning journey.
The world around us is full of interesting shapes, many of which your young learner has likely already seen. Now it’s time to help them make sense of it all!
We can help with our age- and stage-matched learning membership, supporting your child as they explore shapes and develop other critical early learning skills.
Take our online quiz today to discover which stage of our membership is best for your family!